Blog
How to make a video (with SoundMadeSeen)

Published 10/10/2023 by Rane
It's super easy to make a video with SoundMadeSeen - we even made a video to show how easy it is. Trust me, it's not long!
Lets break the process down and add a little more detail:
Upload your audio
Step 1 is to upload your audio!
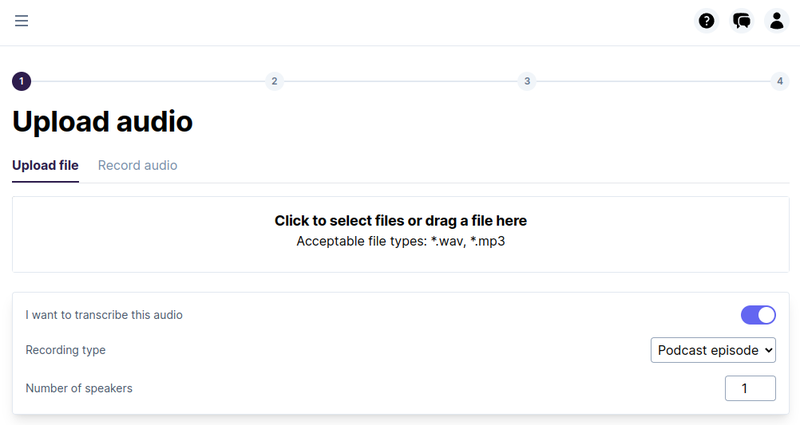
In the screenshot here, you can see that we have the option to select and upload a file. Just click to show the "Select File" dialog, or you can drag and drop files here. If you are on a paid plan you can select to transcribe your audio. You can also select the type of recording eg "Podcast", "Lecture" etc, and the number of speakers. These give the transcription tool hints that aid in the transcription process. Once you have uploaded your audio and filled out the transcription fields, click the "Confirm" button to continue.
Recording Audio
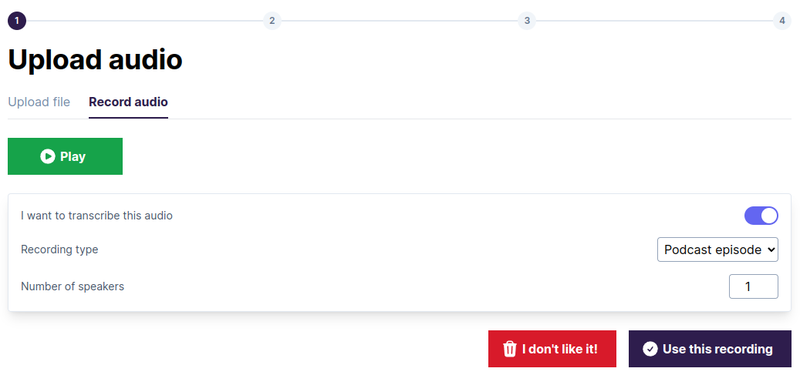
We also have the ability to record your audio directly in the browser by clicking on the "Record Audio" tab. If you are recording audio, click the "Start Recording" button. The first time you do this, you may be asked to give SoundMadeSeen permission to use your microphone. Please select "Allow" or it won't work!

Once you have recorded some audio you can play it back and decide whether you want to use it or not using the respective buttons. You also have the opportunity to transcribe your audio.
Once you have uploaded or recorded your audio, there will be a slight wait while your file is uploaded and the initial processing has begun. You will then see the "Select Audio" page.
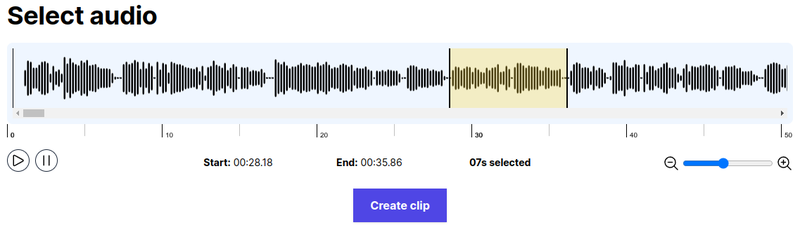
Select your audio
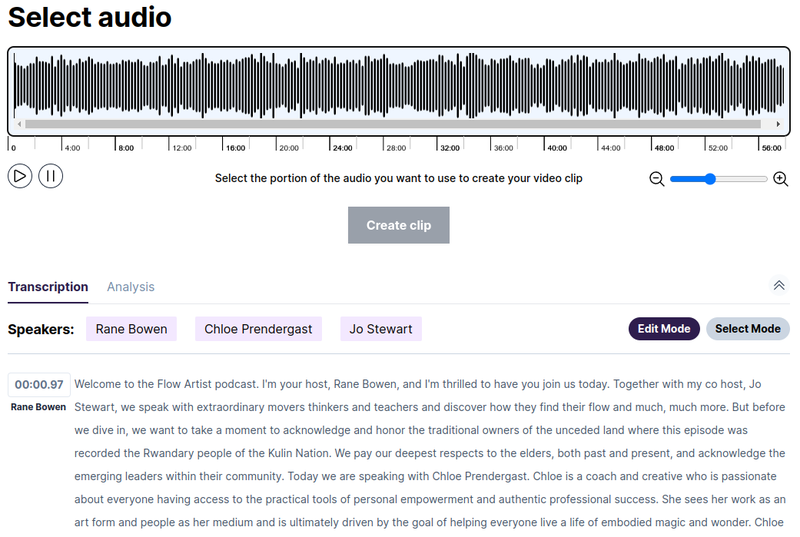
There is a lot going on in this page! We'll go into the transcription and analysis tools more in another blog post, but for now, just know that you can select some audio in the waveform editor using your mouse. You can zoom in and out, and you can play back your audio using the controls here. Once you are happy with your selection, click the "Create clip" to create a short audio clip and move on to the next step!
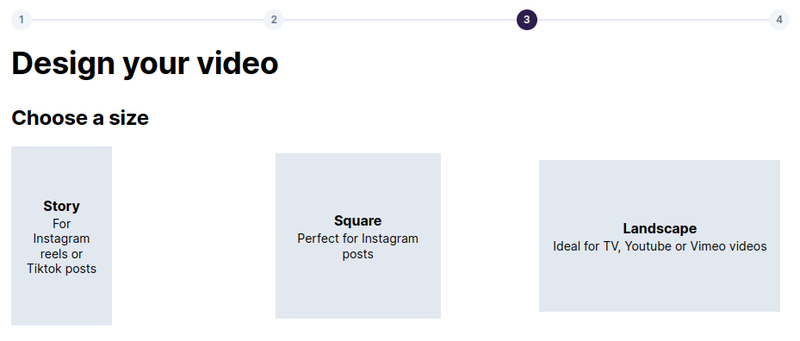
Design your video
Now we are rolling! Firstly, just select the size or aspect ratio of the video you want to create. Currently we have Story (1080x1920 pixels), Square (1080x1080) and Landscape (1920x1080). For this demo, we'll select a square.
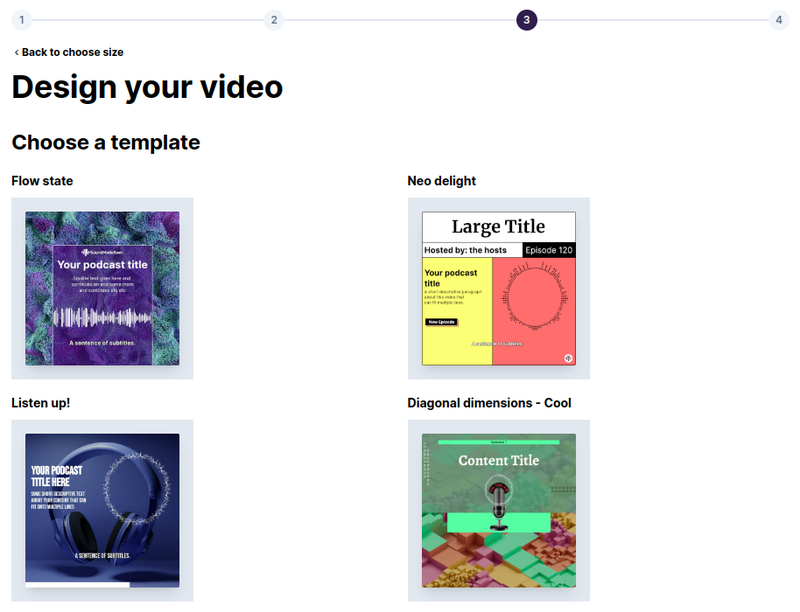
Next, we can select from a predefined template, one of our own previously created designs, or we can make our own design. In the future, we will look at the design editor more closely, but for now we will select from a predefined template.
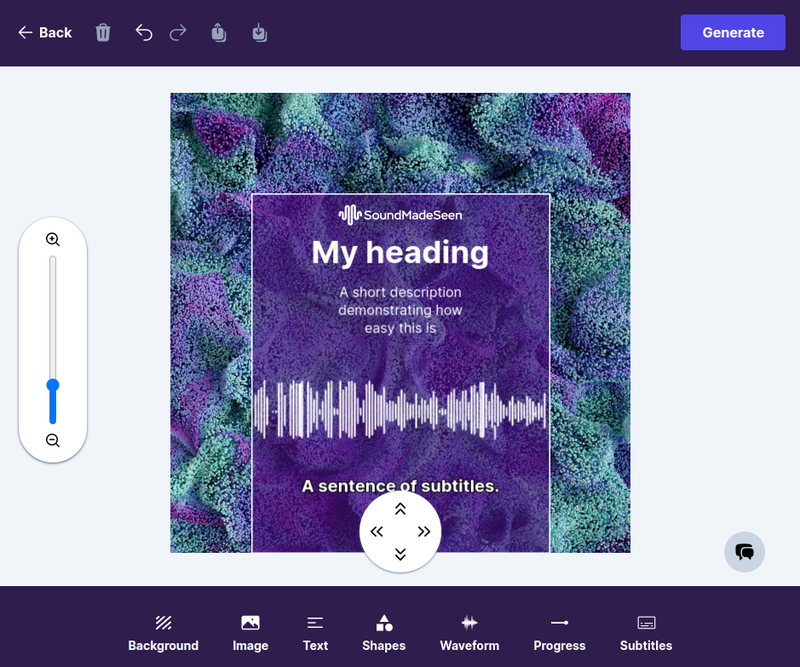
Once we have selected a template, we will be prompted to enter some fields, such as "heading" and "short description" as shown here.

After clicking on the customise button, we will have the opportunity to make tweaks to the design in the design editor. If you're happy though, just click the "Generate" button.
Confirm and make your video!
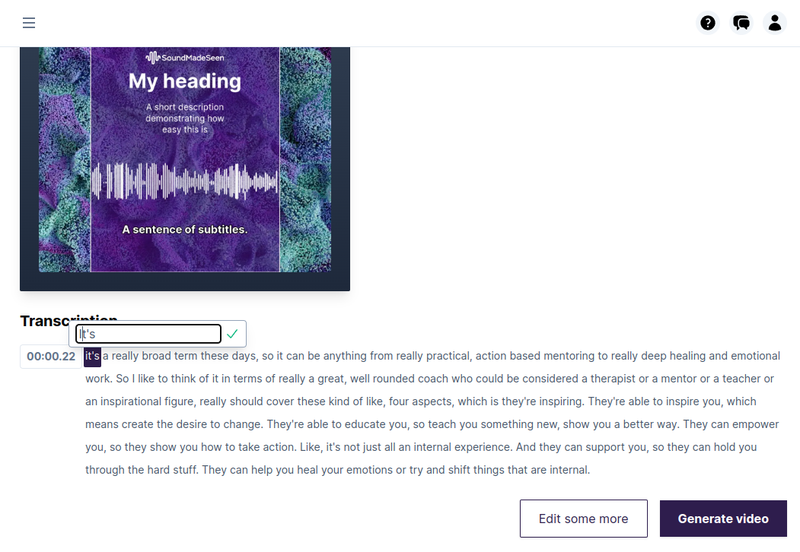
We are on the home straight! We have one last chance to confirm we are happy with our choices, and we can also make any last minute updates to the transcription as shown below. We also have the option to go back to the design editor to make more changes. Otherwise, click "Generate Video" to start the process!
Congratulations!
It will take a few minutes to complete the video generation process. You'll also receive a video when it's done. Eventually, you'll see a screen like below where you can watch and download your video. Well done!

Start creating for free
Turn audio into video, transcriptions and social content in minutes
Try it today